Follow these steps to integrate user attribution using Google Tag Manager.

Step 1: Create a New Tag

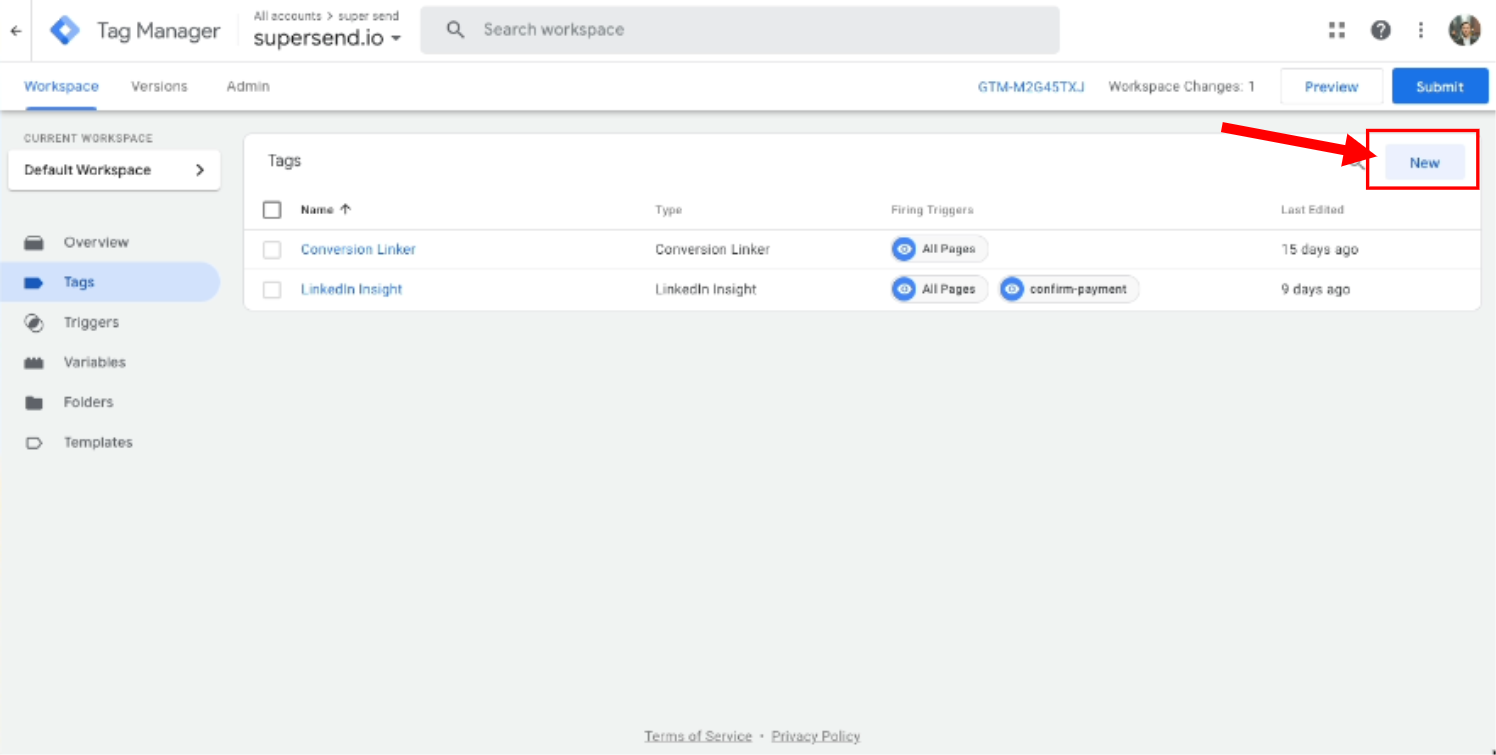
  1. In your Google Tag Manager workspace, click on the New button in the Tags section.

    https://s3.us-east-1.wasabisys.com/userattribution/blog/install-with-google-tag-manager/1.png

Step 2: Configure the Tag

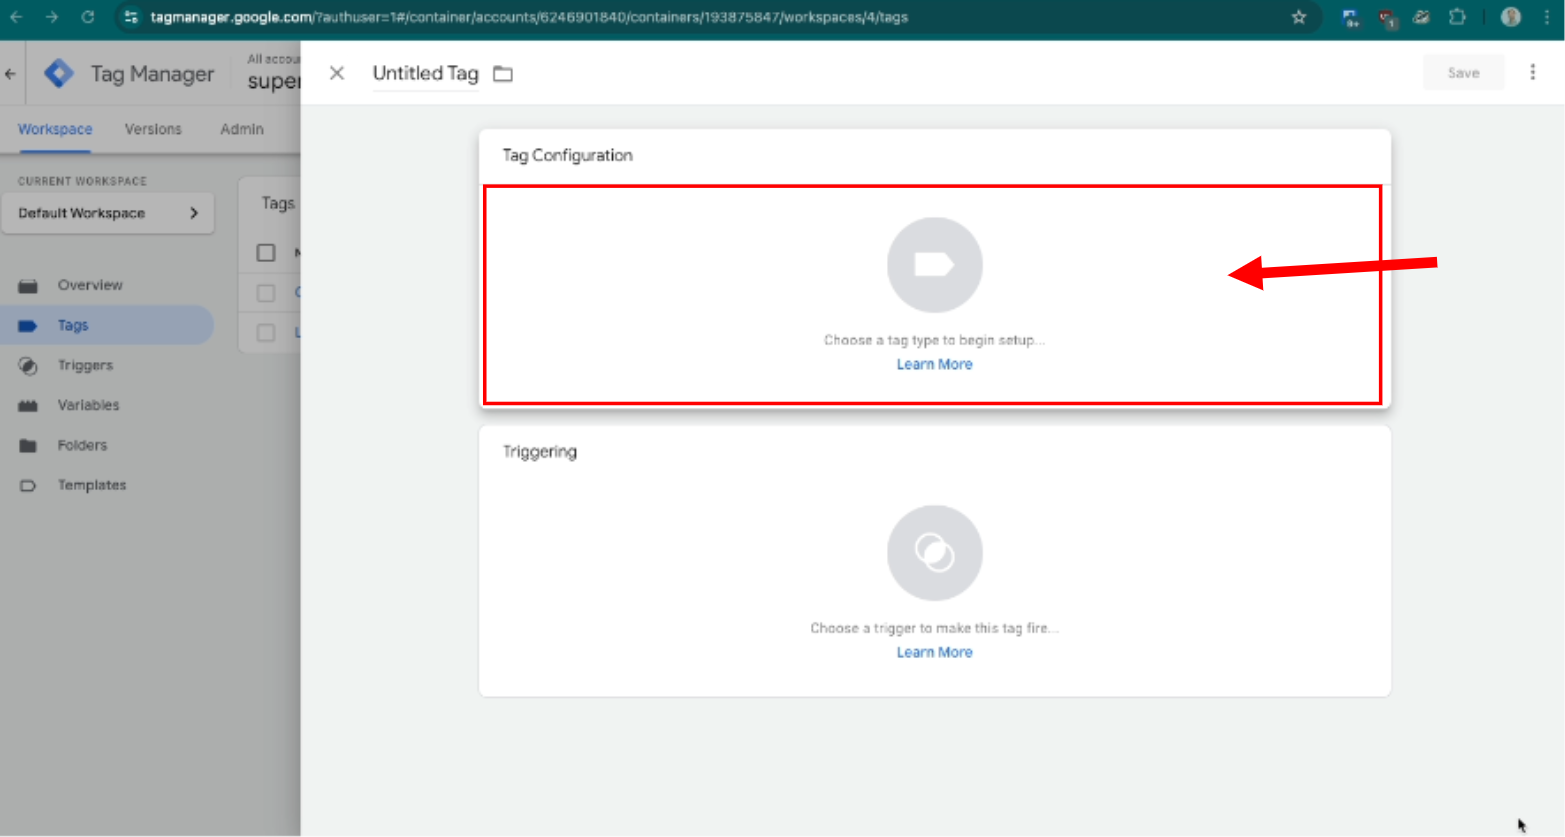
  1. Click on the Tag Configuration box.

    https://s3.us-east-1.wasabisys.com/userattribution/blog/install-with-google-tag-manager/2.png

Step 3: Select Tag Type

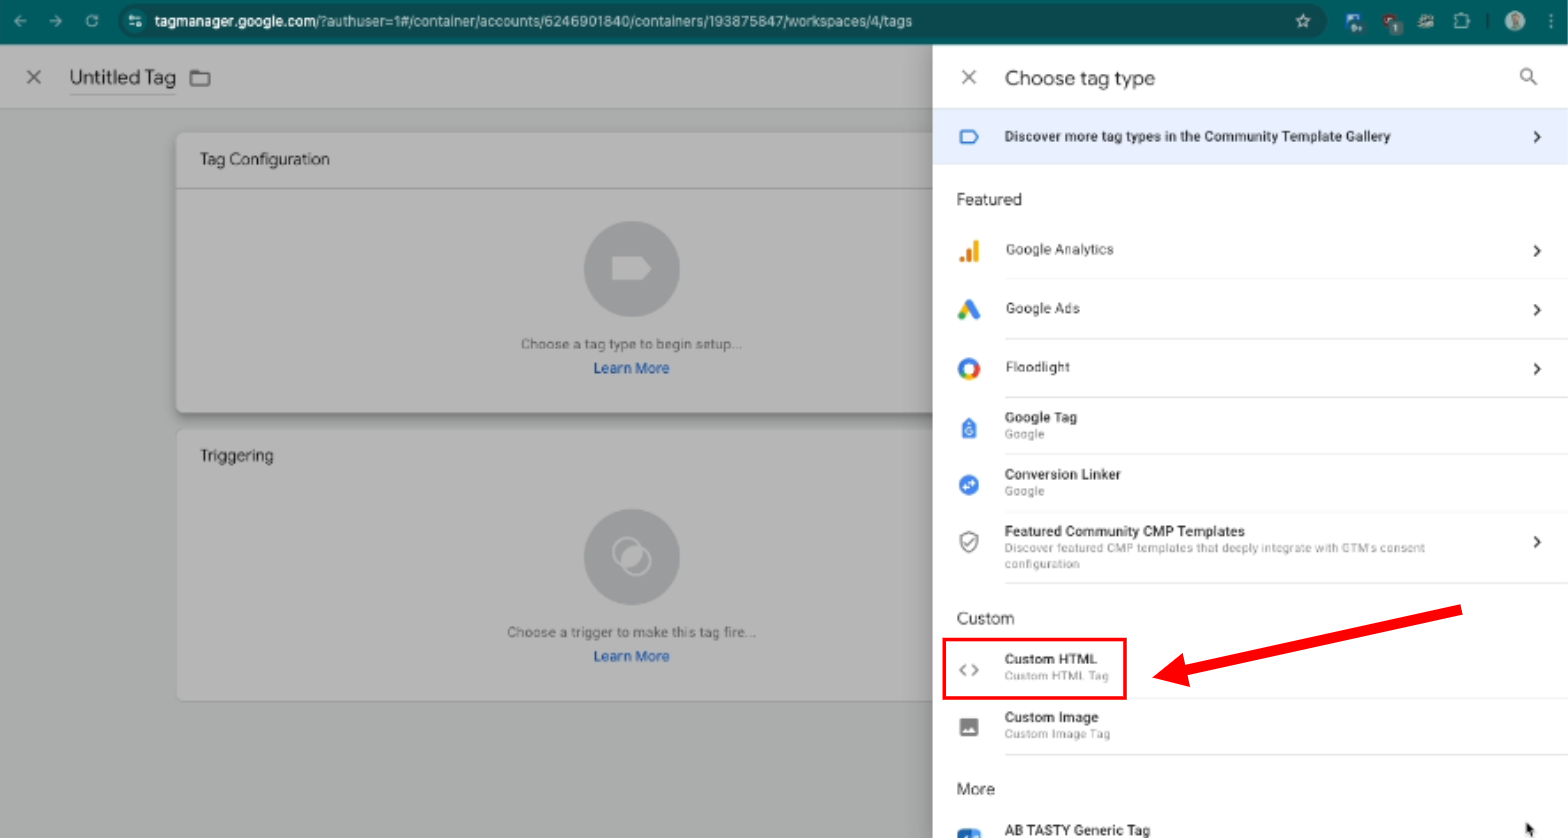
  1. From the list of tag types, select Custom HTML under the Custom section.

    https://s3.us-east-1.wasabisys.com/userattribution/blog/install-with-google-tag-manager/3.png

Step 4: Paste the Script

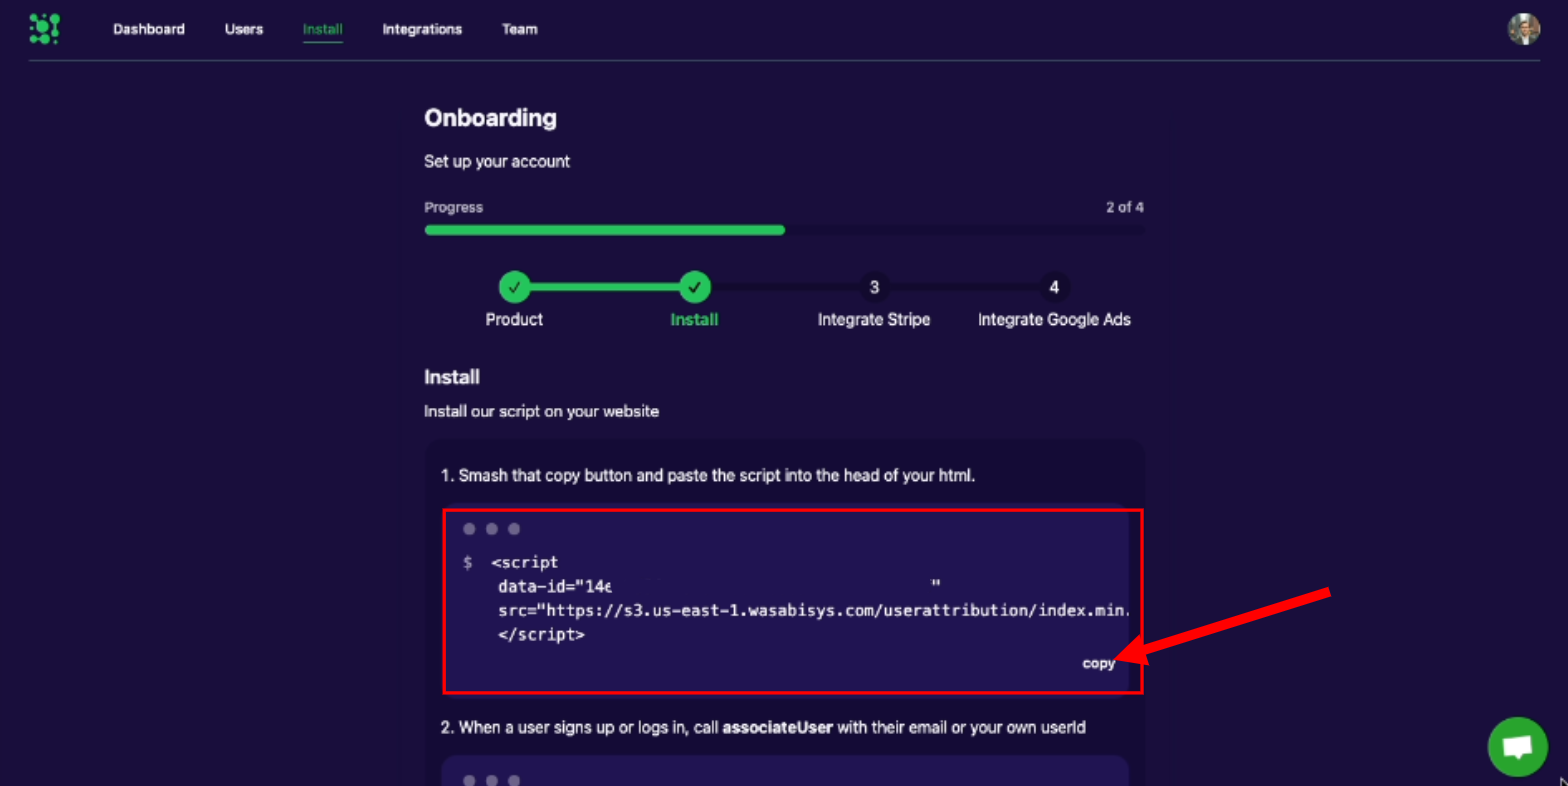
  1. Copy the user attribution script from your onboarding page and paste it into the HTML section.

    https://s3.us-east-1.wasabisys.com/userattribution/blog/install-with-google-tag-manager/4.png

Step 5: Set the Trigger

  1. Set the trigger for this tag to All Pages to ensure it fires on every page.

    https://s3.us-east-1.wasabisys.com/userattribution/blog/install-with-google-tag-manager/5.png

Step 6: Name and Save the Tag

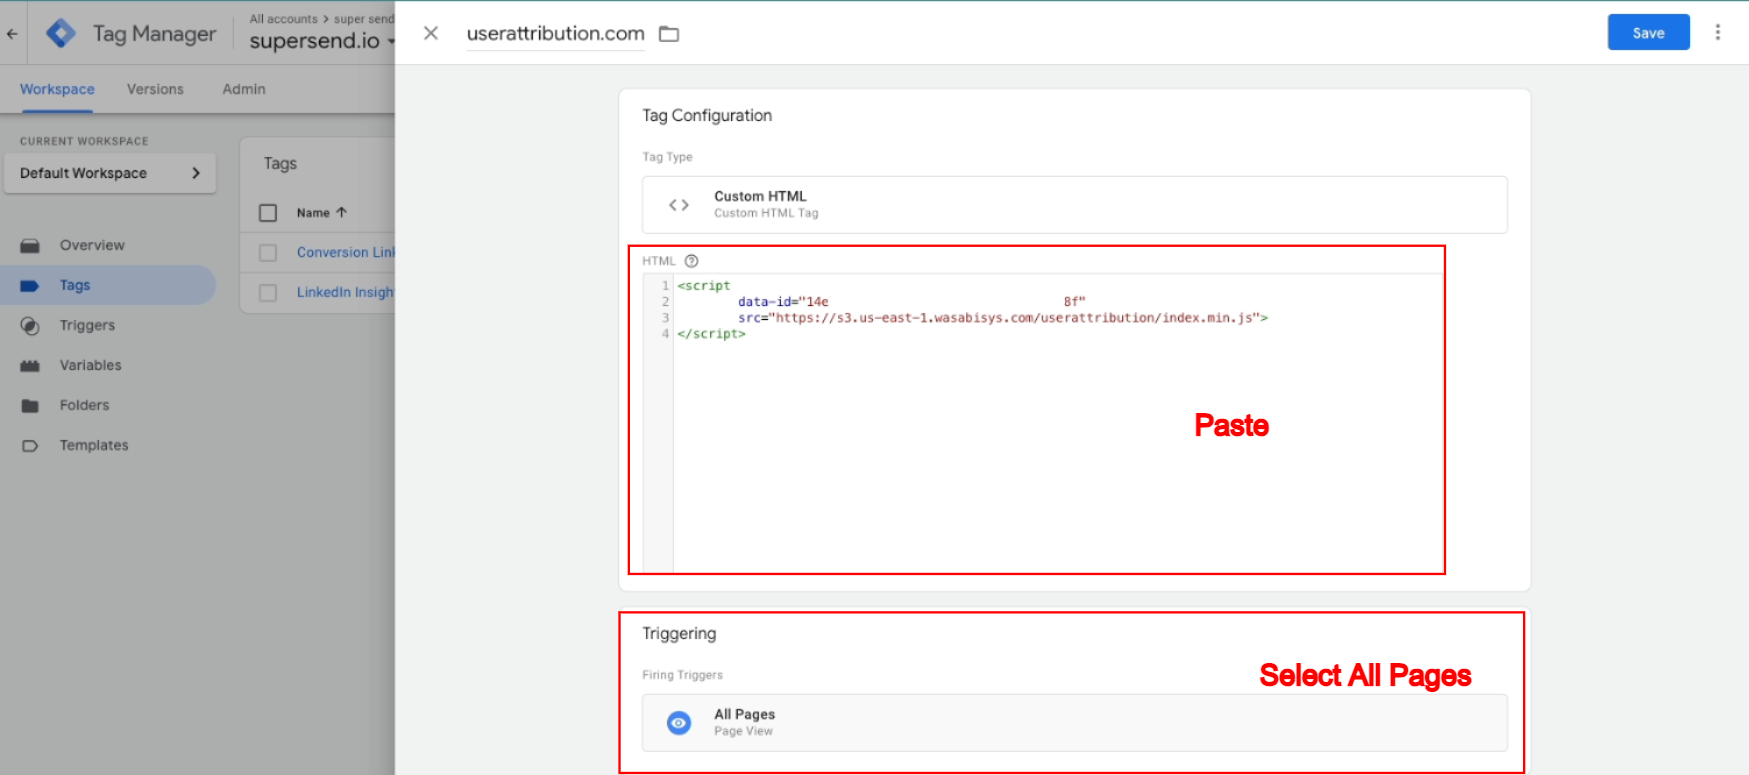
  1. Name your tag (e.g., userattribution.com) and save it.

    https://s3.us-east-1.wasabisys.com/userattribution/blog/install-with-google-tag-manager/6.png

Step 7: Publish the Changes

  1. Click Submit, then Publish to push your changes live.

    https://s3.us-east-1.wasabisys.com/userattribution/blog/install-with-google-tag-manager/7.png

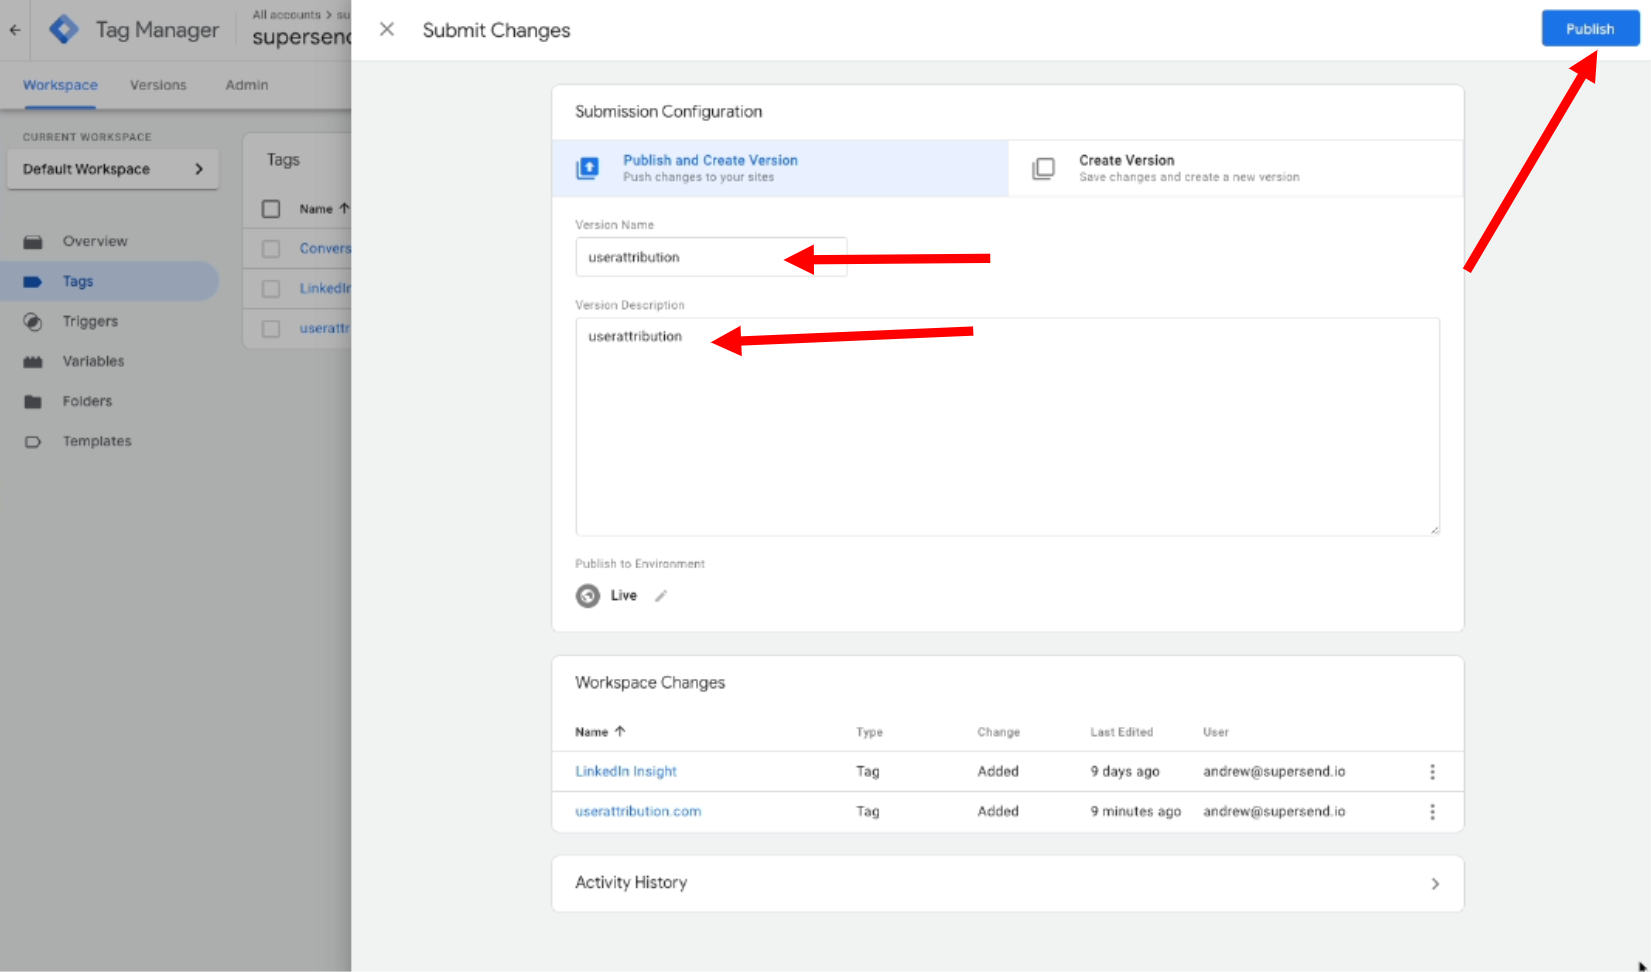
And that's it! You've successfully installed user attribution with Google Tag Manager.

Calling associateUser

This part can be done in GTM if you have the ability to use liquid syntax to grab your user’s email and customer id.